
 |
|
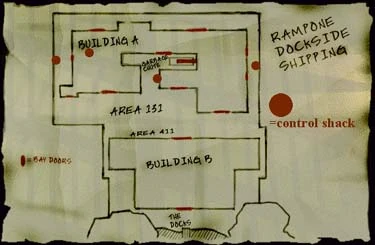
"...Not too many guards, lots of dark corners, and several entry points..."
Other Level Resources:
- Loot Map - Go here for a complete listing of all the loot locations.
- Secrets & FAQ Page - Go here for pictures of all the secrets in this level, as well as some frequently asked questions.
Objectives
- Find a new shipping label and redirect Gilver's shipment by placing the label on the crate outside of his office
- Find 5 bags of spice
- Don't kill anyone
Loot Information:
- Requirements: At least 850
- Available: 1665
- Accounted For: 1665
The Office
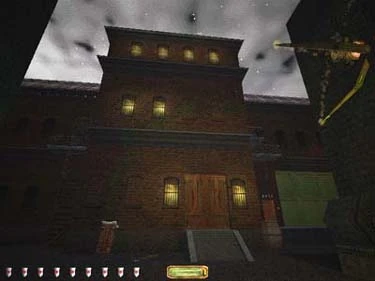
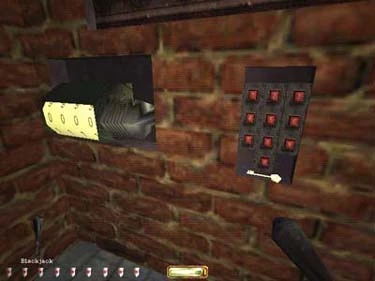
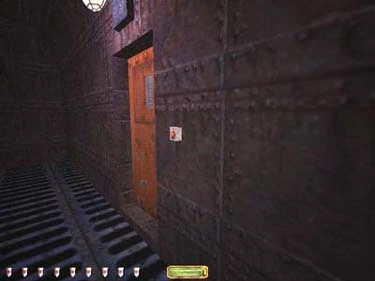
The first priority is to gain access to the control shacks throughout the yard. From your start point, go south and use a crate to jump to the ladder on the left. On the catwalk, look for another ladder which should take you up to the skylights directly above the office (figure 1). Be careful - there aren't too many shadows to hide in, and there are two patrolling swordsmen in the area. There is also a patrolling manager in the office itself, as well as an archer around the corner - so stay quiet! You need to get the key from the control box in the room to the right (figure 2). Be warned that the archer can see you through the window of this room, so you may need to knock him out before entering this room.
 |
|
| Figure 1 | Figure 2 |
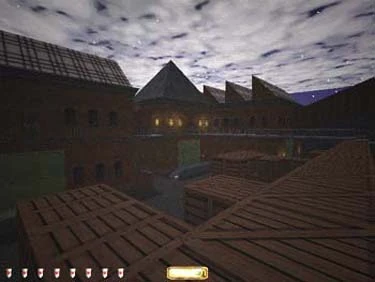
Go past the archer and into the hallway. Find a way back down to the ground. Completing Building A is simply a matter of exploring each space, though you can do so in any order. The following section breaks each space down. First familiarize yourself with the location of each control shack (figure 3), and the posted guards. You may want to remove a few patrols before you start. It seems the easiest way to travel is on the ground. The catwalks are noisy, and the doors inside are often inaccessible from the halls. For some equipment and loot scattered amongst the crates in the yard, see figure 4.
 |

|
| Figure 3 | Figure 4 |
Key to Figure 4:
- Flare
- Idol (15 Goods) and Flares
- Rope Arrow
- Slow-fall potion, Flash-Bomb and Flare
- Flare, Noisemaker Arrow and Flash-Bomb
- Water Arrow and Idol (15 Goods)
Building A
It might be to your advantage to begin back near your start point and hit Capezza's place first since you'll get your scouting orb and some other supplies to help with the rest of the mission. Obviously, it's best to use the control shack nearest the space you're cleaning out, and it helps to clear the main warehouse (front and back) of any guards so you'll have a convenient cut through.
- 0457 - CID CAPEZZA - Look for a scouting orb on the shelf on either side of the room, as well as some flares, a flash-bomb, and some loot. There's a water arrow in the sink and some loot on the right shelf.
- 0634 - LADY ANGELICA'S - Check the shelf in the back for some potions.
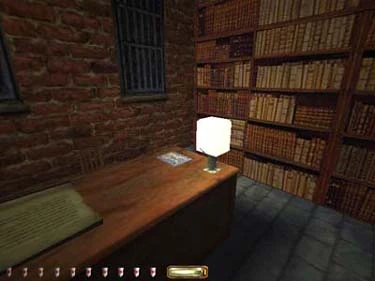
- 7732 - R. BRAMRICH - Pick up the new label on the desk here (figure 5). You'll put it on the crate outside of Gilver's office later.
|
| Figure 5 |
- 6957 - LORD PORTER'S ART - Tons of loot behind the counter. In the art gallery, shoot the crystal ball in the picture for an idol. To get up the elevator, look up and shoot the button, although there's not much up there.
- 0928 - NOAH GERM - If you can't get around the guard and worker here, consider approaching from the inside of the building and dropping through the garbage chute to get closer to the door. Make sure to grab the glasses in the office and the crystal from the top shelf.
- 0266 - LUCKY SELENTURA - The key for the safe is in the box on the top shelf.
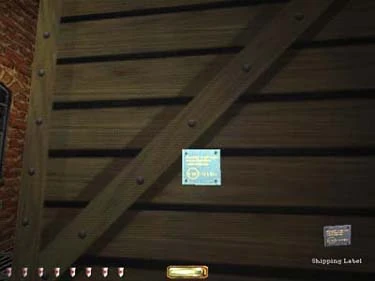
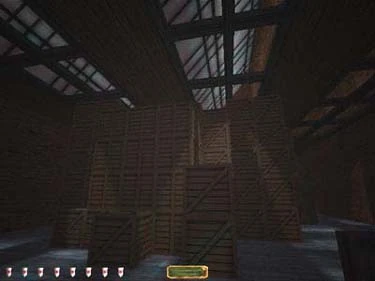
- 7933 - GILVER'S EXPORTING - Put the label on the big crate inside the door (figure 6) Upstairs, there's two crates with loot behind the boxes if you climb up here (figure 7). Also don't forget to grab the plates from the long shelf.
 |
|
| Figure 6 | Figure 7 |
- 5188 - T.M. BLACKHEART - Grab the gear from the console to open the door, then make sure to get the flute and the recording from the tables inside.
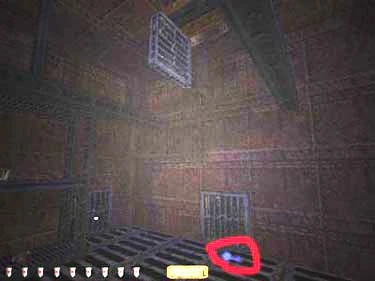
- 6013 - MYNELL STEAKS - Beware the spiders as you enter. There's a statue in the back corner of the cage, and one by the boxes in the main space. Take the south elevator up to the freezer, push the button near the door to open the top vents, and grab the key that falls (figures 8 and 9) or you can climb atop the freezer from outside and grab the key from on top of the freezer. You'll have to climb out the top, go back down and up the north elevator to open his safe and get the valuable recipe.
 |
|
| Figure 8 | Figure 9 |
- 0590 - KILGOR WEAPONS - Climb the crates downstairs for a secret, then go upstairs for some supplies.
Building B
The best way to Building B is up the steps from the southeast hallway of Building A. This brings you up near the first security camera you will see in the game. The shutoff switch for this camera is at the top of the stairs to the right (you have to look closely to see it in the dark). The meeting room on the right has some loot, and the office on the left has a secret door hidden in a bookcase and some loot. You can go out the back door here and drop down to the second floor staircase. You'll need to get a key from the patrolling swordsman on the second floor, as well as Davidson's key from one of the pirates pacing back and forth between the first floor south door and the ship. Use this red key to open the far southwest office (J. Osterlind's), and Davidson's key to open the various crates with spice. There are seven bags of spice total:
- Osterlind's office
- Davidson's belt (he's on the pirate ship)
- Davidson's quarters (on the ship)
- Top deck storage crate (on the ship)
- Building B - among the southeastern crates
- Building B - among the northeastern crates
- Building B - among the southwestern crates
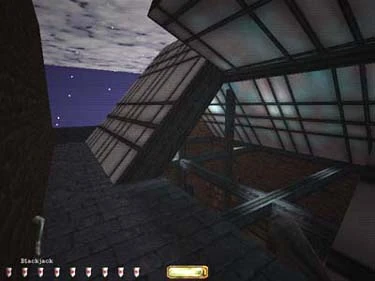
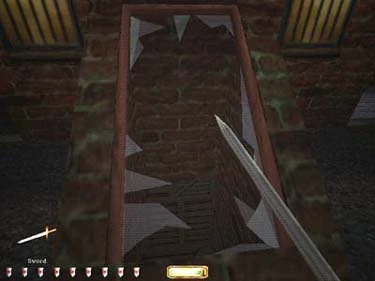
To access the spice in the warehouse crates, go through the second floor offices out to the roof and jump down through the skylights (figure 10). Preferably, go to the southeastern corner to begin, as you can also obtain a rope arrow from a nearby crate. The spice will be in the crates with the locks on the side - use Davidson's key to unlock these crates. As for the rest of Building B, use the controls in the northwestern office to open the bay doors for the larger areas. The Rare Artifact Bay on the east side of the second floor contains some loot. The room with the three crates (near the eastern staircase) and the hole in the roof contains a secret (figure 11).
 |

|
| Figure 10 | Figure 11 |
Davidson's Ship
You can swim or sneak to the dock, then sneak up on Davidson to grab his bag of spice. The upper storage unit also contains a bag of spice, along with a few spiders. Turn the wheel up top and toggle the telescope to open the secret crate in Davidson's quarters below deck. Behind each banner in his quarters is a secret, and the hold contains a gold wine bottle under the right bench just through the door.
Back to Index / Back to Running Interference / Forward to Framed